
 Now for what Mom wore to Grandma’s Last Party.
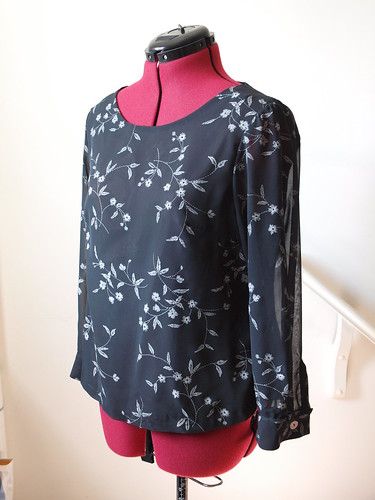
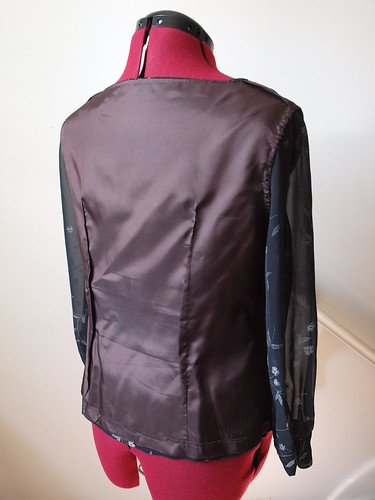
Mom wanted a top with a draped neckline like the Renfrew. The Renfrew felt too casual for the event. Though I can’t have Mom Glam for the party, I can at least make her something Fab with a simple long sleeved top with a nice neckline.
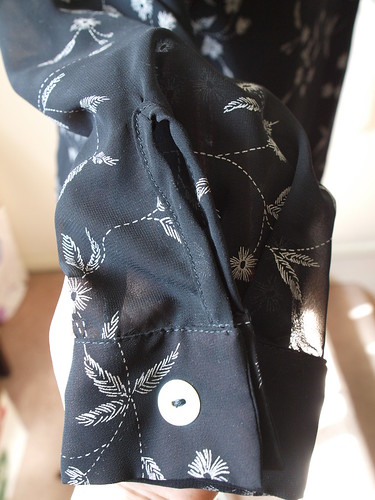
The pattern I had in mind was the custom Laurel/Alma mash-up from Mom’s Holiday wardrobe. I cannot stress how well those sleeves look with the cuffs. I am still waiting to make one for myself.
Fabric and Notions
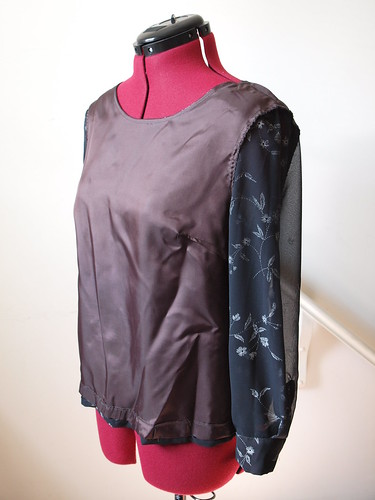
After sewing the Sewaholic Saltspring (will post in a week or so), I’ve become more confident with trying out lightweight fabrics. We saw this sheer black fabric printed with swirls of white flower and leaves. I knew it was the one. For lining, I contrasted the print with something brown to make it pop, plus it was only $2/m. Quickly had the fabric cut 10 minutes before store closing. Total cost of fabric is $20.
Back to the stash for shell buttons. Have to buy more when I get the chance.
Construction and Alternations
Schedule was tight with only a week to sew. I worked on Mom’s blouse first before starting on my dress. There were lots of late-night sewing since evening was dedicated to handling family arrangements.
Sewing 2 Tops
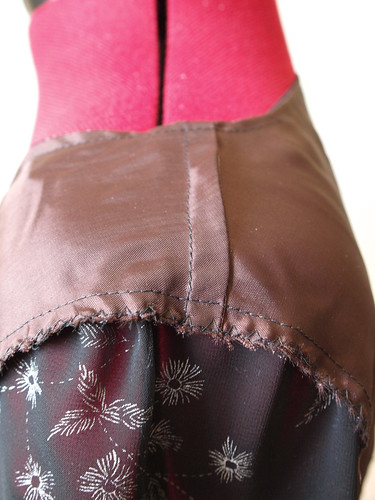
The plan was to have the outer sheer top and the brown lining attach at the neckline and cuffs. I did consider the underline method but the print becomes less prominent (Plus Mom prefers a separate lining piece than an underline). I went ahead with sewing the two layers and stopped prior to setting the sleeves and cuffs to see how Mom likes it.
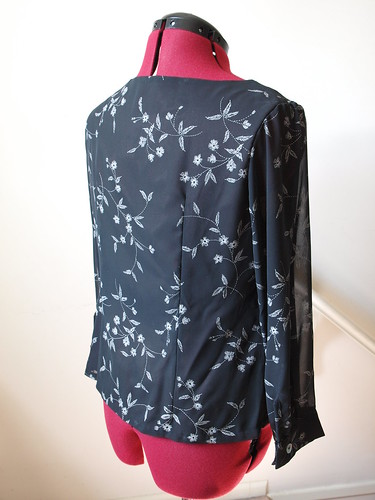
When Mom wore the 2 layers together, we both agreed on skipping out the sleeve lining, leaving only the sheer outer layer covering the arms. The results look more youthful and less matronly.
 Combining the 2 Layers
The 2 layers are sewn together at the neckline, which was then graded and understitched. I basted the layers around the arm opening to treat them as one when sewing the sleeve. Then I would sew another round of stitches 3/8″ from what I had sewn earlier. Next I trimmed down the seam up to the 2nd line of stitches. Finally, a row of zigzag around the edge to mimic a serger.
Seam Finishing
The shoulder and side seams are all french seamed. Fabric was a cooperative fray monster.
Final Thoughts
I oooh-ed and aaah-ed over the top when Mom brought it out for me to photograph. The neatness of the edgestitch surprised me the most since it used to be super wobbly and crooked. Wonder when Mom will get tired of this pattern….
- Love…love…LOVE the sleeves!!
Icy
